
Blog
Google Merchant Center Setup: Ultimate Guide to Boost Sales Fast
Mar
Google Merchant Center helps you show your products on Google. It lets people find your items when they search online. Setting it up is easy. This guide will help you step by step.
What is Google Merchant Center?
Google Merchant Center is a tool. It lets businesses upload product information to Google. When people search for products, Google shows your items. You can use it with Google Ads or free listings.
It helps people see your products in shopping results. This can bring more visitors to your website. More visitors can mean more sales.
Credit: growmyads.com
Why Use Google Merchant Center?
- Show your products on Google Shopping.
- Reach more customers online.
- Manage product details in one place.
- Connect with Google Ads to run ads.
- Get better visibility for your products.
Step 1: Create a Google Account
First, you need a Google account. If you have Gmail or YouTube, you can use that. If not, go to accounts.google.com/signup and make one.
Use your business email if possible. This keeps your work separate from personal stuff.
Step 2: Sign Up for Google Merchant Center
Go to merchants.google.com. Click “Get Started.”
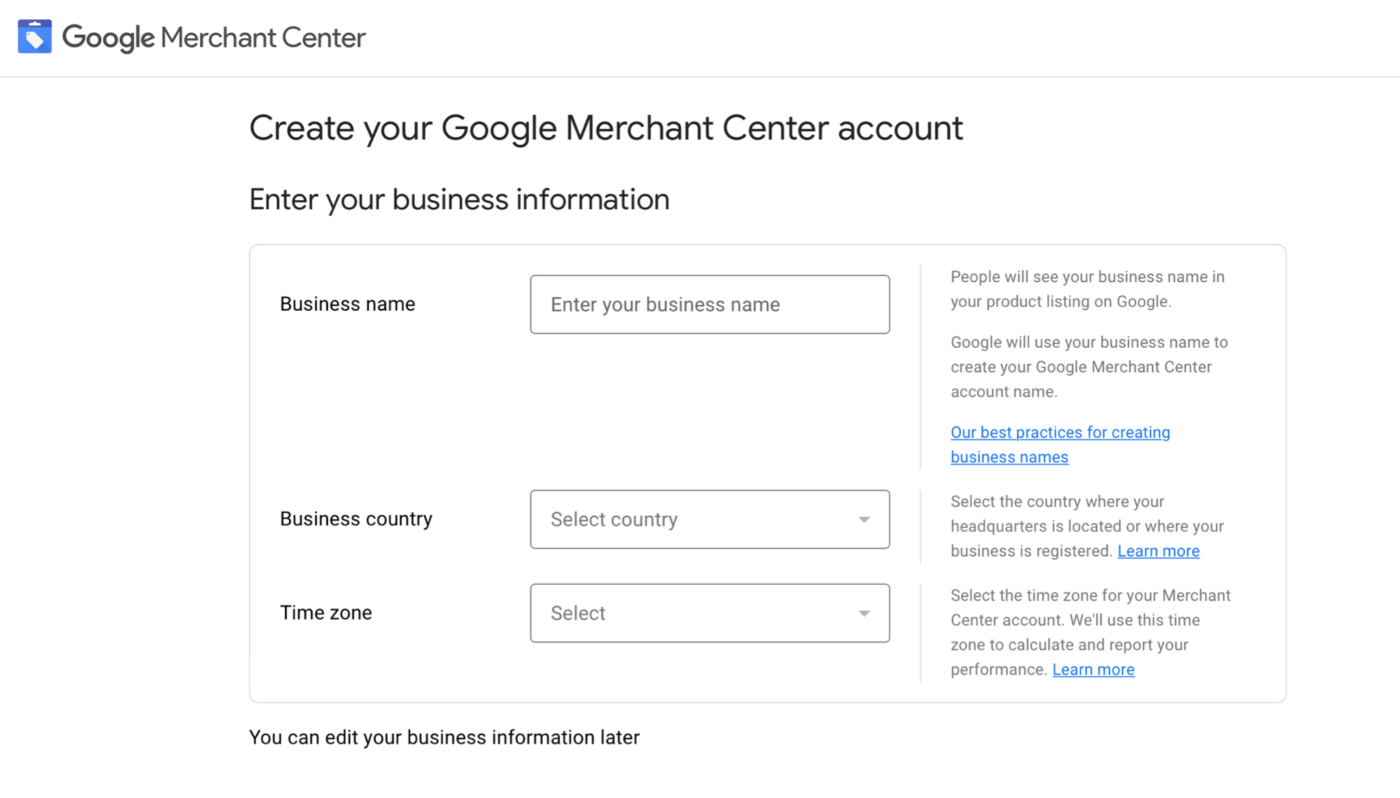
Log in with your Google account. Then, enter your business information:
- Business name
- Country where you sell
- Time zone
Agree to the terms and click “Create Account.”
Credit: www.wordstream.com
Step 3: Verify and Claim Your Website
Google needs to check your website. This makes sure you own it. Verification is important.
There are four ways to verify:
- HTML file upload: Upload a file to your website.
- HTML tag: Add a code to your website’s header.
- Google Analytics: Use your Analytics account.
- Google Tag Manager: Use your Tag Manager account.
Choose one method. Follow Google’s instructions to verify your site. After verification, you must claim your website. This links your site to your Merchant Center account.
Step 4: Set Up Shipping and Tax Settings
Google needs to know how you ship products. Also, it needs tax info.
In the Merchant Center, go to “Shipping and returns.”
- Add shipping methods you use.
- Set shipping costs.
- Set delivery times.
Next, go to “Tax.” Enter tax rates for your area.
This info helps Google show correct prices. It stops surprises for customers.
Step 5: Create a Product Feed
The product feed is a file with your product details. Google reads this file to show your items.
You can create feeds in different ways:
- Upload a spreadsheet (like Excel).
- Connect your website via API.
- Use e-commerce platforms (Shopify, WooCommerce).
Your feed should include:
| Field | Description | Example |
| id | Unique product ID | 12345 |
| title | Product name | Blue T-shirt |
| description | Short product details | Comfortable cotton T-shirt |
| link | Product page URL | https://example.com/blue-tshirt |
| image_link | Product image URL | https://example.com/image.jpg |
| price | Product price with currency | 20.00 USD |
| availability | Stock status | in stock |
Make sure your feed is complete and accurate. Errors can cause problems.
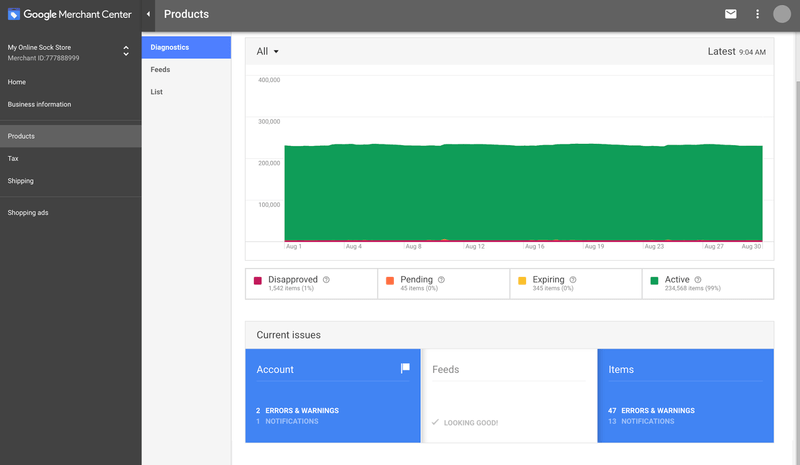
Step 6: Upload Your Product Feed
In Google Merchant Center, go to “Products” > “Feeds.”
Click the “+” button to add a new feed. Choose your target country and language.
Select the feed type (usually “Scheduled fetch” or “Upload”). Upload your product file.
Google will check your feed for errors. Fix any issues and re-upload if needed.
Step 7: Link Google Merchant Center with Google Ads
If you want to run ads, link your accounts. This helps you create shopping campaigns.
In Merchant Center, go to “Settings” > “Linked accounts.”
Find Google Ads and click “Link.” Enter your Google Ads ID.
After linking, you can create ads using your product feed.
Tips for a Successful Google Merchant Center Setup
- Use clear product titles and descriptions. This helps people find your items.
- Keep prices updated. Wrong prices can cause disapproval.
- Use high-quality images. Good photos attract buyers.
- Check your feed regularly. Fix errors quickly.
- Follow Google’s policies. This avoids account suspension.
Common Problems and How to Fix Them
Sometimes, your products may not show. Here are reasons and fixes:
| Problem | Cause | Solution |
| Feed Errors | Missing fields or wrong format | Fix errors in your feed file |
| Disapproved Products | Policy violations or bad data | Review Google policies, correct data |
| Website Not Verified | Verification not done or failed | Verify and claim website properly |
| Shipping or Tax Issues | Incomplete settings | Set up shipping and tax in Merchant Center |
Frequently Asked Questions
What Is Google Merchant Center Used For?
Google Merchant Center helps you upload your product data to Google. It connects your online store with Google Shopping ads. This makes your products visible to more buyers.
How Do I Create A Google Merchant Center Account?
Visit the Google Merchant Center website and sign up with your Google account. Enter your business information and website URL. Verify and claim your website to start.
What Products Can I List On Google Merchant Center?
You can list physical products that you sell online. Products must follow Google’s policies and be in the allowed categories. Digital products or services are not accepted.
How Do I Submit Product Data To Google Merchant Center?
Use product feeds in formats like XML or CSV to upload data. You can also connect your store platform directly. Make sure product details are accurate and updated.
Conclusion
Google Merchant Center helps your products reach more buyers. It is simple to set up. Follow these steps carefully.
Remember to keep your product data accurate. Check for errors often. Link with Google Ads to promote your products.
With patience and care, your products will appear on Google. This can help your business grow.